Coptic Binding: Create a Durable and Decorative Handmade Book
Coptic binding is a captivating and robust bookbinding technique celebrated for its unique exposed spine stitching. This method creates a beautiful, functional book, ideal for journals, sketchbooks, and personalized gifts. This detailed guide will walk you through each step, from preparing your signatures to executing the distinctive Coptic stitch. Let’s get started!
What You’ll Need
- Bookbinding Paper: Choose a paper weight suitable for your project (65-90gsm is a good starting point).
- Bookbinding Thread: Waxed linen thread is traditional and strong, but other durable threads will work.
- Needle: A long, blunt-tipped bookbinding needle.
- Bone Folder: For crisp folds.
- Awl: For creating holes in the signatures.
- Cutting Mat: To protect your work surface.
- Ruler: For accurate measurements.
- Pencil: For marking.
- Signatures: These are the bundles of folded paper that will become your book’s pages. The number of pages per signature depends on the paper and desired thickness.

Preparing Your Signatures
The number of signatures you’ll need depends on the final page count of your book. A signature typically contains 5-8 sheets of paper, folded in half. Accuracy is key at this stage - precise folds contribute to a well-bound book.
- Fold the Paper: Use the bone folder to create a crisp, even fold.
- Create Signatures: Gather the folded sheets into neat bundles (signatures).
- Count and Prepare: Determine the number of signatures needed based on your desired page count.
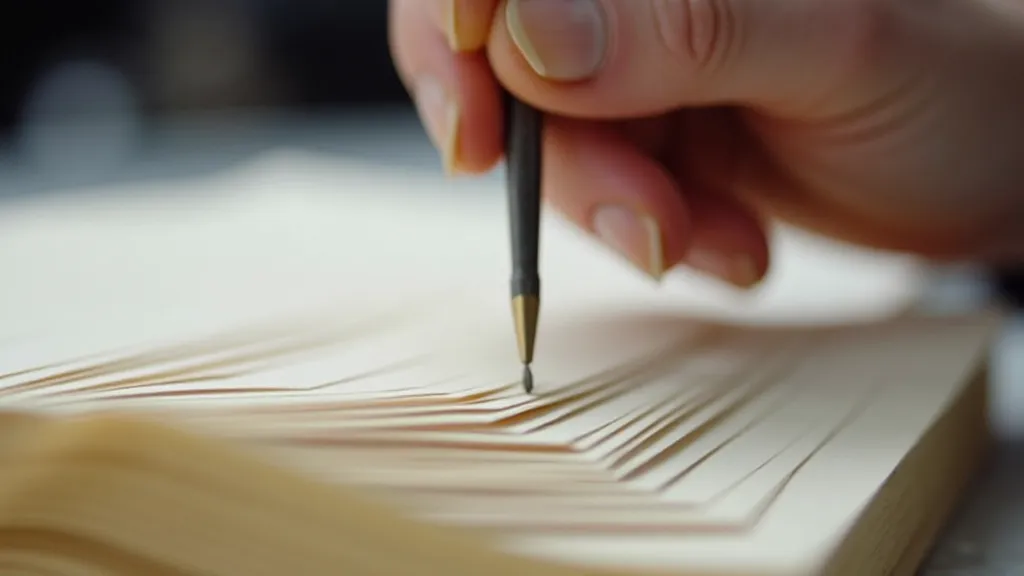
Marking and Drilling the Holes
The placement of the holes is crucial for the Coptic stitch. Traditionally, a small number of holes (typically 5-7) are evenly spaced along the spine of each signature. Use the following steps to accurately mark and drill them:
- Mark the Spine: Using a ruler and pencil, mark the positions of the holes along the spine of each signature. Ensure the markings are consistent across all signatures.
- Drill the Holes: Using an awl, carefully drill holes at each marked position. Maintain a perpendicular angle to the paper.
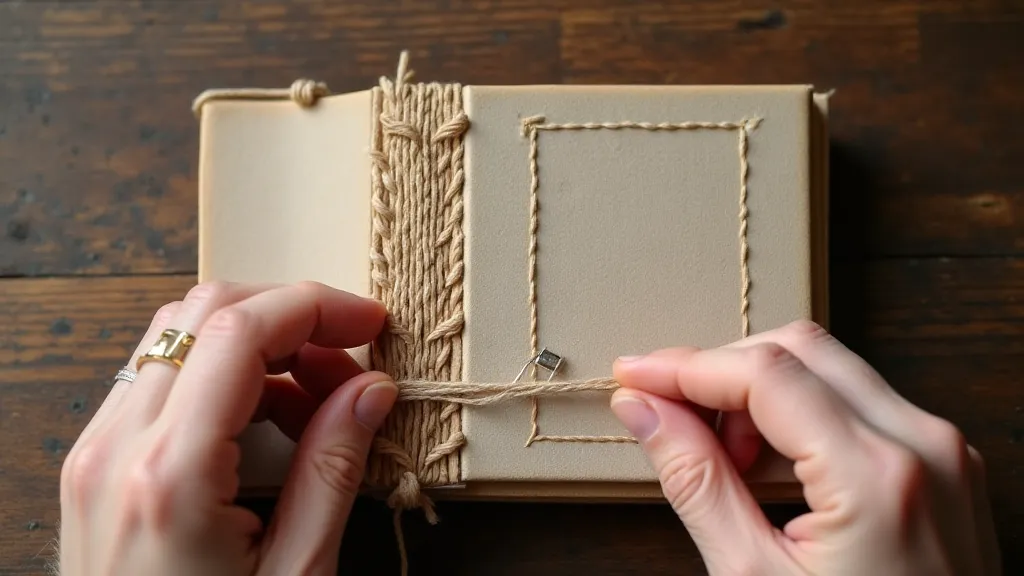
The Coptic Stitch: Step-by-Step
The Coptic stitch is a series of interconnected stitches that create the signature chain. Here's how to execute it:
- Start with the First Signature: Thread your needle with a length of waxed linen thread. Begin stitching through the center hole of the first signature.
- Stitch to the Second Signature: Take the needle across to the corresponding hole in the second signature and bring it back up through the hole directly above the starting hole in the first signature. This creates the first stitch.
- Repeat the Pattern: Continue this pattern, alternating between the signatures, working your way outwards from the center.
- Secure the End: Once all signatures are connected, secure the end of the thread with a tight knot.
Finishing Touches
Once the stitching is complete, trim any excess thread. You can add endpapers or a cover to further enhance the aesthetic of your handmade book. Enjoy your beautifully bound creation!
Tips for Success
- Practice Makes Perfect: The Coptic stitch can be tricky at first. Don't be discouraged if your first attempt isn't perfect.
- Consistent Hole Spacing: Accurate hole placement is crucial for a clean and sturdy binding.
- Use a Bone Folder: Crisp folds are essential for a professional-looking book.